California Wildlife Garden from Scratch - Before & After
Jump to a Section:
Out with the Old
1. Brazilian Pepper Tree Removal
2. Synthetic Turf Removal
3. Concrete Removal
4. Rock and Landscape Fabric Removal
In with the New
1. Draft Design Plans
2. Install Irrigation
3. Plant Keystone Plants
4. Add Garden Structures
5. Plant a Native Lawn
6. Spread Mulch
7. Sow Wildflower Seeds
Just under two years ago in June 2022, we moved into our current home.
It checked all the boxes we wanted in a home: it was in the neighborhood we wanted with the right number of bedrooms, and it even had a gorgeous view!

A view of the canyon past our back fence taken from the balcony in 2022
We really scored with this one.
But, as a wildlife gardener, the backyard left a lot to be desired. It was entirely composed of synthetic turf (aka plastic carpet), landscape fabric covered in rocks, invasive plants - and to top it all off - an established brazilian pepper tree. Complete with baby pepper trees covering the retaining wall area. You can watch a full video tour of the original yard here.

It looked tidy and green, but it was void of wildlife.
We love a challenge, right?
In all honesty, having such a wildlife-unfriendly garden helped me make peace with ripping everything out and starting from scratch. If it was even 20 percent more wildlife-friendly, I might have had a tough time embracing a complete redo of the yard.
But the backyard as it was when we moved in, though it looked tidy and the shade was nice, was an absolute wildlife deterrent and heat trap.
Out with the Old
After settling into the inside of the house, in Fall of 2022 it was time to tackle the backyard. I’d come to terms with ripping the whole thing out and starting from scratch. Here are the chronicles of the entire process of demo work involved:
1. Brazilian Pepper Tree Removal
As much as I hate to pull out an established tree, I decided the Brazilian Pepper Tree had to go. I’ll break down my thoughts on why we removed the pepper tree in a future blog post. But for now, suffice it to say that Brazilian Pepper Trees are rated as moderately invasive by the California Invasive Plant Council.
When I saw that pepper trees were already forming groves in the Rose Canyon near my house, I decided I needed to wage war. The tree had to go.
I did a major deep dive for six months on the best way to go about removing a pepper tree. I ultimately decided to have the tree manually removed and the stumps ground as far as the tree company was able to grind the roots.


I read on every online forum that I should expect to hand-pull or spray hundreds of pepper tree babies for about three years after removing the tree. Happily, I’ve only found about six pepper tree babies in the year and a half since the tree was removed. They’re the only thing in my yard that I spray Round-Up on, because I want to make sure the roots are fully dead.
2. Synthetic Turf Removal

I know a lot of people love synthetic turf. What’s not to love? It stays green year-round and it uses zero water.
Personally, I think synthetic turf ought to be banned.
This blog post isn’t meant to be a rant about synthetic turf, so I’ll just sum up the problems with synthetic turf in bullets for now:
It’s a heat trap - On a sunny day, synthetic turf can be 37 degrees farenheit hotter than asphalt and 86 degrees F hotter than natural turf.
It supports no life - it’s effectively a giant plastic tarp. Everything underneath the synthetic turf gets killed. Nothing lives on it either.
It releases microplastics.
It supports global warming.
It’s not recyclable - this was a tough one for me. Though companies that sell synthetic turf tout that it’s recyclable - and it technically is - it’s a whole other matter to find someone actually willing to recycle it for you. I searched high and low and was unable to find anyone who could take it.
Seriously I could rant on and on about this, but the takeaway for now is synthetic lawn has no place in my garden. You can learn more about the negatives of artificial turfs here.
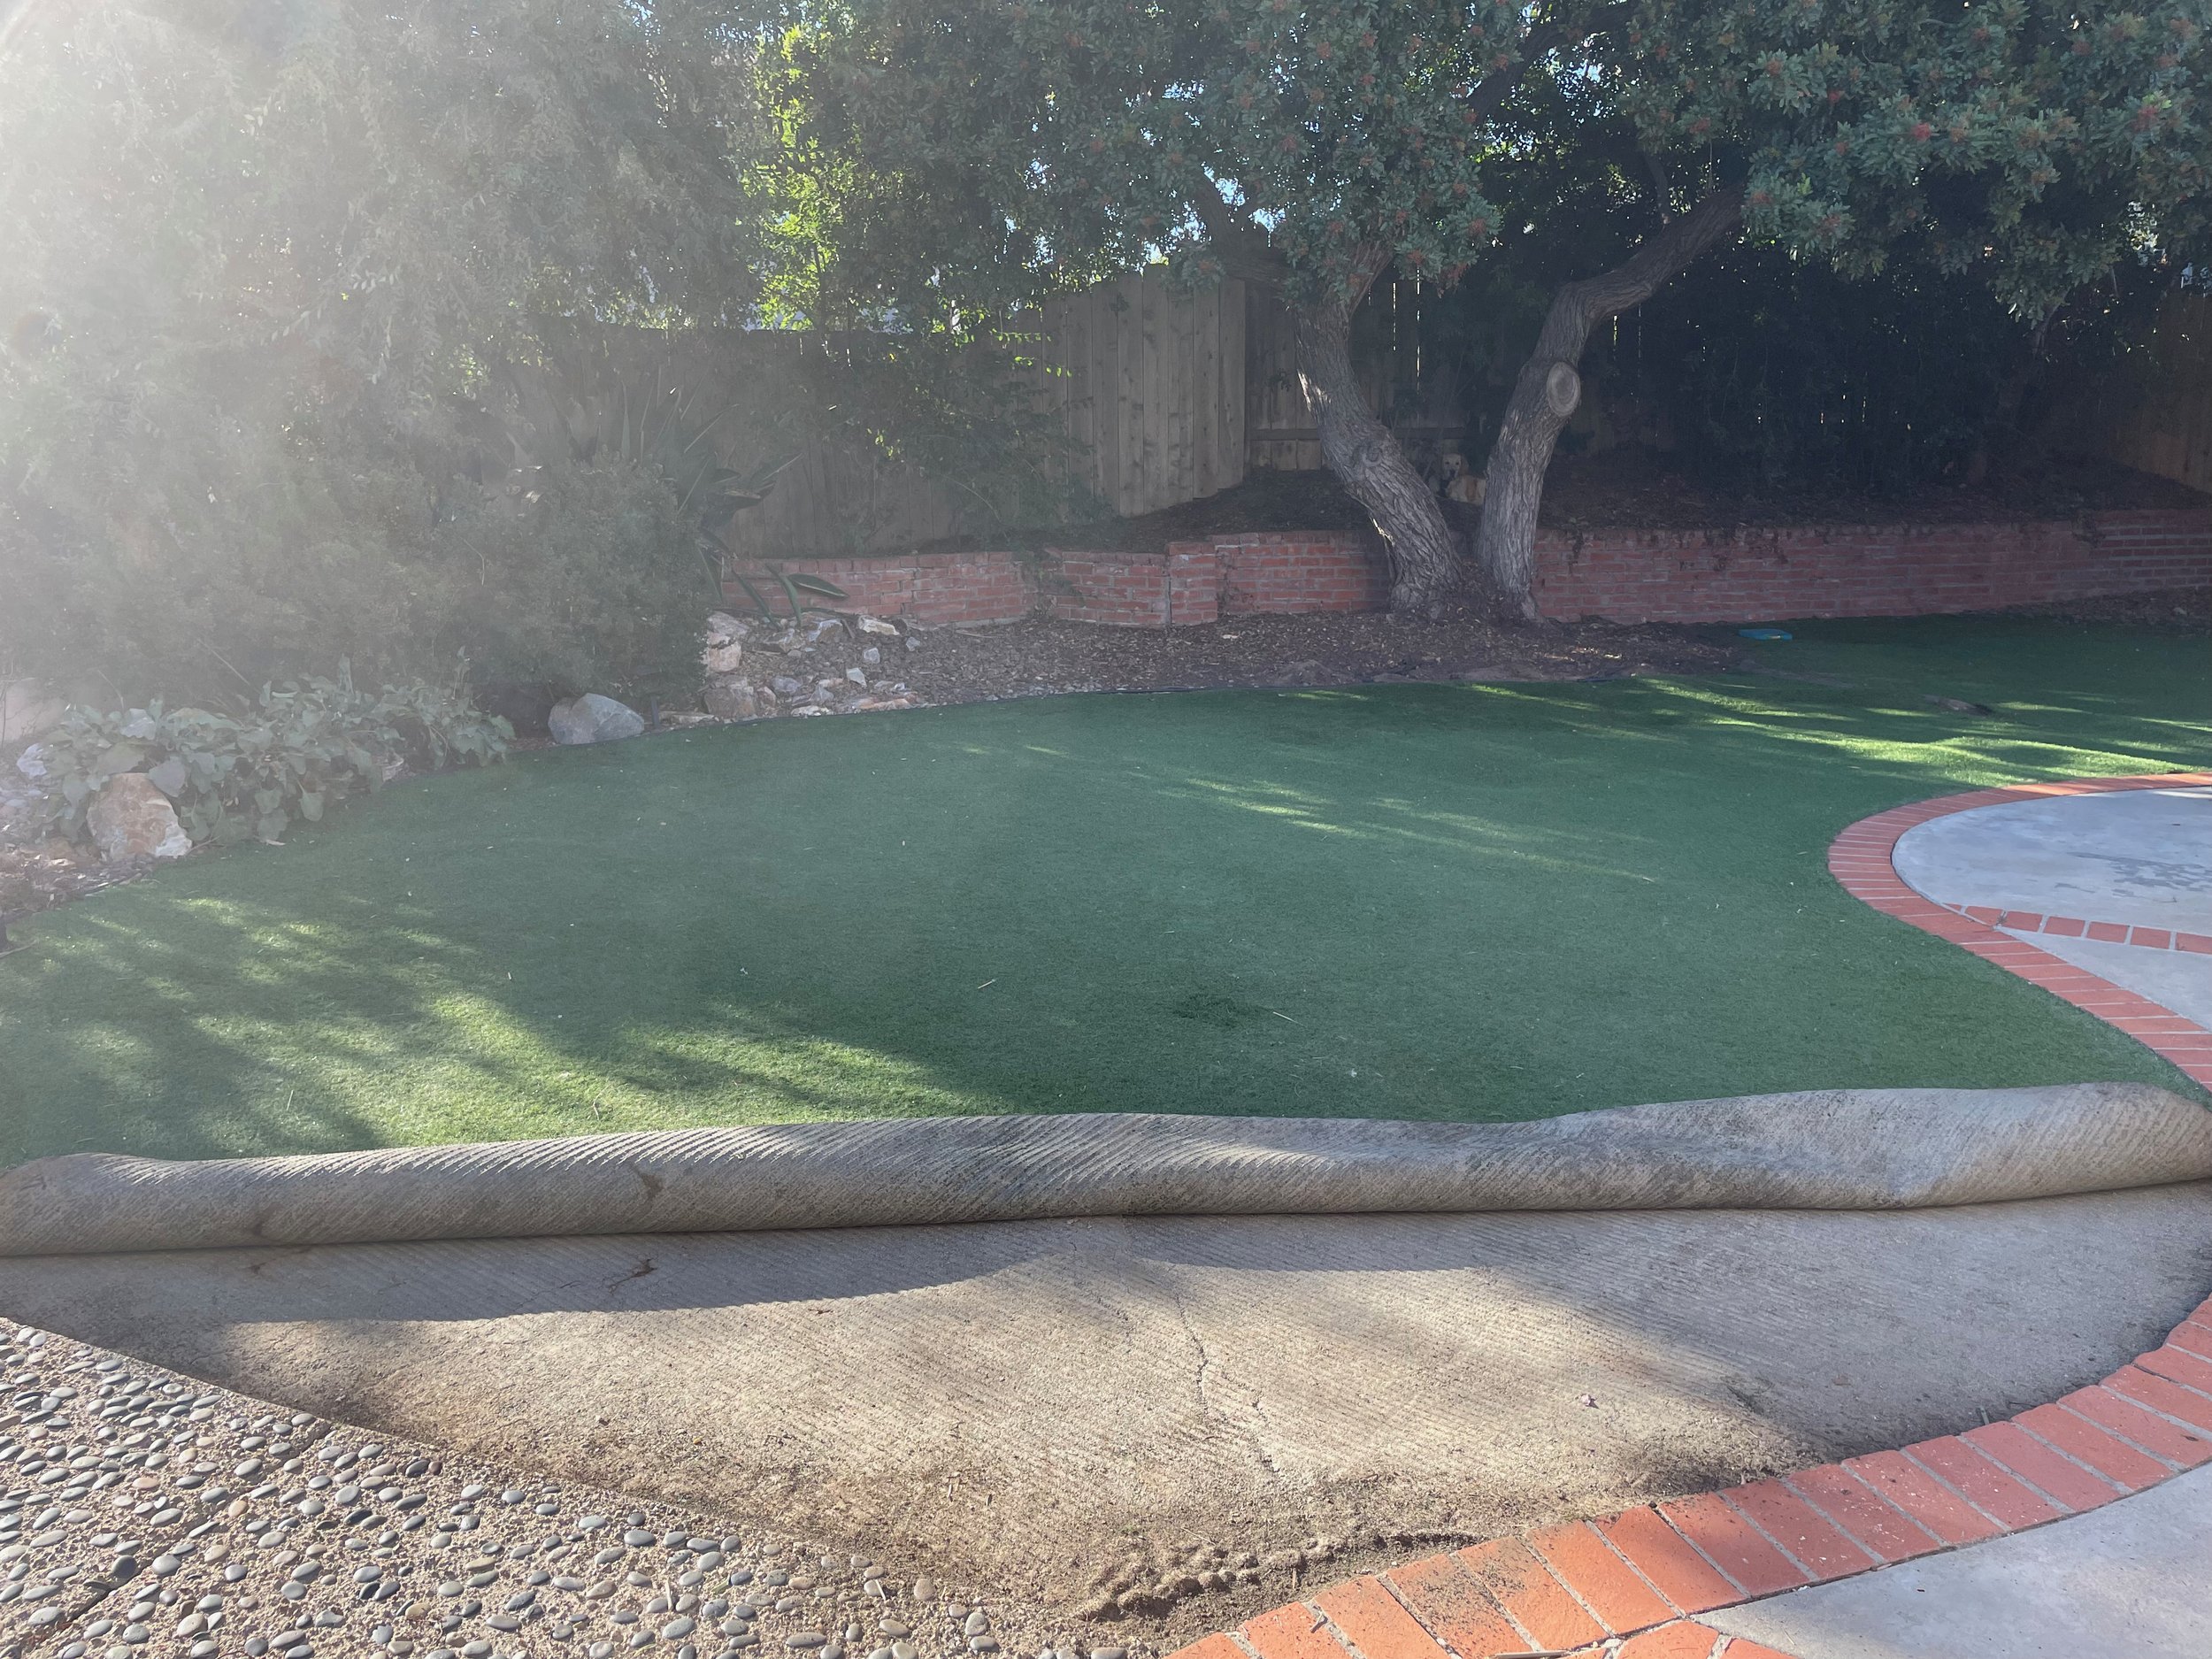
I thought it would be relatively easy to just roll up the turf - it’s just plastic carpet after all, right? But when it’s properly installed it has a thick layer of sand added to keep it weighed down. The added weight of the sand made turf removal rather challenging. I picked up a corner and shook as much sand into a central pile as I could, then I moved the sand with a shovel back underneath where the lifted turf was.
It was a process. My brother came and helped with some of it. I even stayed up late one night working on pulling that thing out. Eventually, I did it.


Sadly, the turf now lives in the landfill. This part of the garden renovation makes me sad and I wish I could have found a better alternative.
3. Concrete Removal
I knew I wanted to remove some of the concrete patio. The patio was taking up nearly a third of the yard, which is more patio than I need. In particular, there was an area of the patio that created an odd shape sticking out into the rest of the yard.
I don’t have a great picture of it, but you can see it in this photo from the perspective of looking down on it from the balcony:

It’s the rectangular-shaped section outlined with bricks.
There was also a concrete pathway making a loop through part of the garden. In addition to prefering water-permeable pathways, the shape and placement of this path didnt make sense to me. Out it went.

An in progress shot. The concrete path is removed and the pergola has been taken down.

This is what it looked like after they removed that rectangular piece of bonus patio.
To my great chagrin, we also unearthed five (yes FIVE) concrete pads hiding under the synthetic turf. We believe they were remnants from when the balcony once extended nearly to the back fence. Apparently, in the 90’s it was trendy to have a giant balcony instead of a backyard?
These pads were at least 12 inches deep and required a specialist to remove them.

One of the five 12-inch-deep concrete pads that required a specialist. You can see the landscaping crew tried using their jackhammer to get it but it wasn’t heavy-duty enough.
It was a nightmare, but once all that concrete was removed I felt like I could breathe. The garden was a dirt lot, but it felt much larger and I could visualize my native garden design more clearly now that I had a nearly blank canvas.
4. Rock and Landscape Fabric Removal
The last bits of the yard that I hadn’t touched yet were lined with landscape fabric and covered in river rocks.
Easy peasy, right?
NO!
This proved to be far more taxing than I imagined. From what I could tell, a few different layers of rocks had been laid on top of each other over the years. In some spots, the rocks were more than six inches deep.

Here’s a zoomed-out example of the river rocks lining the perimeter of the yard
Why remove the rocks?
I notice many folks growing native plants will mulch their garden with rocks or pebbles. In the past, I used rocks as well. It was an aesthetic I liked at the time, and it doesn’t decompose while still retaining moisture.
Here’s why I’ve since come to strongly dislike using rocks as mulch:
Weeding is a nightmare. Even if you lay landscape fabric underneath, weed seeds will still germinate between the rocks and the roots will burrow their way through the fabric. Now you have a weed that you have to both dig out from between rocks (which often winds up hurting my hands), and you have to yank them out from the fabric itself, which isn’t always easy to do.
Rocks radiate heat. Though many native plants thrive when they have rocks near their base, an entire garden of rocks holds a ton of heat. Darker rocks hold more heat, and lighter rocks reflect so much light that they can become blinding to look at, especially in our Southern California sun. Regardless of rock color, organic mulch is much cooler both for the plants in your garden and also for the overall temperature of your yard.
It’s hard to pick up dog poop. I know, I’m just telling it like it is. I have a 70-pound golden retriever. Every time I’d go to pick up her poops, some of it inevitably got stuck in between the crevices of the rocks. With plain dirt or mulch, it rakes straight into my doggy poop bin easily.
So, out the rocks came and out came the landscape fabric. I piled them in a corner to give away to neighbors and I put the rest up for free on Facebook marketplace.

This was one of several piles of river rocks I gave away to neighbors
In with the New
As I’m writing this blog post, it might sound like each of these steps happened in neat chronological order.
In reality, it was a bit more jumbled. For example, you can still see some partially rolled-up turf in the photos of concrete removal above.
All in all, by the time I had things fully demo-ed it was January 2023. But by then, I had already gotten started installing new things.
So I don’t have a photo of the garden as a proper blank slate, since it was always in a state of flux. I’d be halfway done with one project and then a different project would already be underway.
That said, here are all the things that went into creating a native wildlife garden from scratch:
1. Draft Design Plans
I’ve been gardening for 15 years. In that time, I’ve lived in six different places, each with a different garden I tended to. And though each of those gardens was beautiful and special in its own way, I never created any of them with a garden design or plan.
In the past, I’d have an idea and throw it into the yard. Want a firepit? Throw it in the corner of the yard! It’d be great to have a wildlife pond too. Here’s an open spot, put it there!

The wildlife pond at our old house in 2018 (clearly before I knew about invasive plants!)
And as fun as it is to have a childlike spirit and do whatever you feel in the moment with the garden, I realized this time that I wanted a sense of structure. I wanted a backbone of the garden to create a sense of intentionality, purpose, and cohesion.
And don’t worry, there’s still plenty of room to play once some cornerstone design elements are set. But I knew this time I wanted to design the core structure of the garden before I stuck a shovel in the ground. In fact, I designed the entire back garden before we ever moved into the house.
I was eager to absolutely nail this garden. I guess the sixth time’s the charm, right?
I tried a few strategies to design the garden. I thought some of the augmented-reality apps would be incredible. But the apps I tried at the time were super clunky, they didn’t save my work from prior design sessions, and they didn’t feature native plants, let alone plants that grow in a Mediterranean climate.

An initial haphazard attempt at using an AR garden design app
So I did a hybrid of using tech and doing things the old-fashioned way.
I had the greatest success with taking a screenshot of my backyard in Google Earth and uploading that photo into a design app, like SmartDraw. Here’s how my initial mockup looked:

I made some tweaks since this initial design, but the general effect and measurements stayed the same.
Google Earth has a measuring feature, so I was able to have loose measurements of the yard to work with before we even moved into the house.
I incorporated four main sections in the garden design: a native lawn, a woodland area, a play area, and a wildflower meadow.
Once I had a loose design in the app I went into the garden and used a combination of plant stakes and landscape paint to mark out my design. Taller plant stakes represented trees and tall shrubs.
A portion of the garden mapped out with paint and stakes
2. Install Irrigation
Once I had the garden design set and painted on the ground, it was easy to share my design mock up with a landscape crew. I had a crew lay half-inch drip tubing throughout most of the yard, and conventional lawn sprinkler heads for the native lawn. I would just plan to run the sprinkler heads less often and for a shorter length of time than a traditional lawn.
I wanted the freedom to shift my design as I planted, so I had the crew hold off on tapping in any quarter-inch tubes or emitters into the drip system. I’d set that up on my own later.
I’m so glad I did it that way because I wound up changing the placement (and number!) of individual plants in the garden quite a bit. It also made me super familiar with the irrigation system so I can easily identify and address any issues or breaks in the drip system.
3. Plant Keystone Plants
Time to plant! Finally!
At this point, it was January 2023 and it had been a few months since starting to tackle garden demo. But it had been many many many months of planning. And it was finally time to put a plant in the ground. YAY!
Initially, I bought a few key plants that would be the backbone of the yard, including a toyon hedge along the back retaining wall and a few trees and shrubs in the woodland area. I also wanted to plant a few fast-growing plants like bush sunflower to help fill in the space while waiting for the main stunners to fill in.

My first haul of California native plants, including: toyon, bush sunflower, manzanitas, matilija poppy, creeping wild rye, and California poppies.
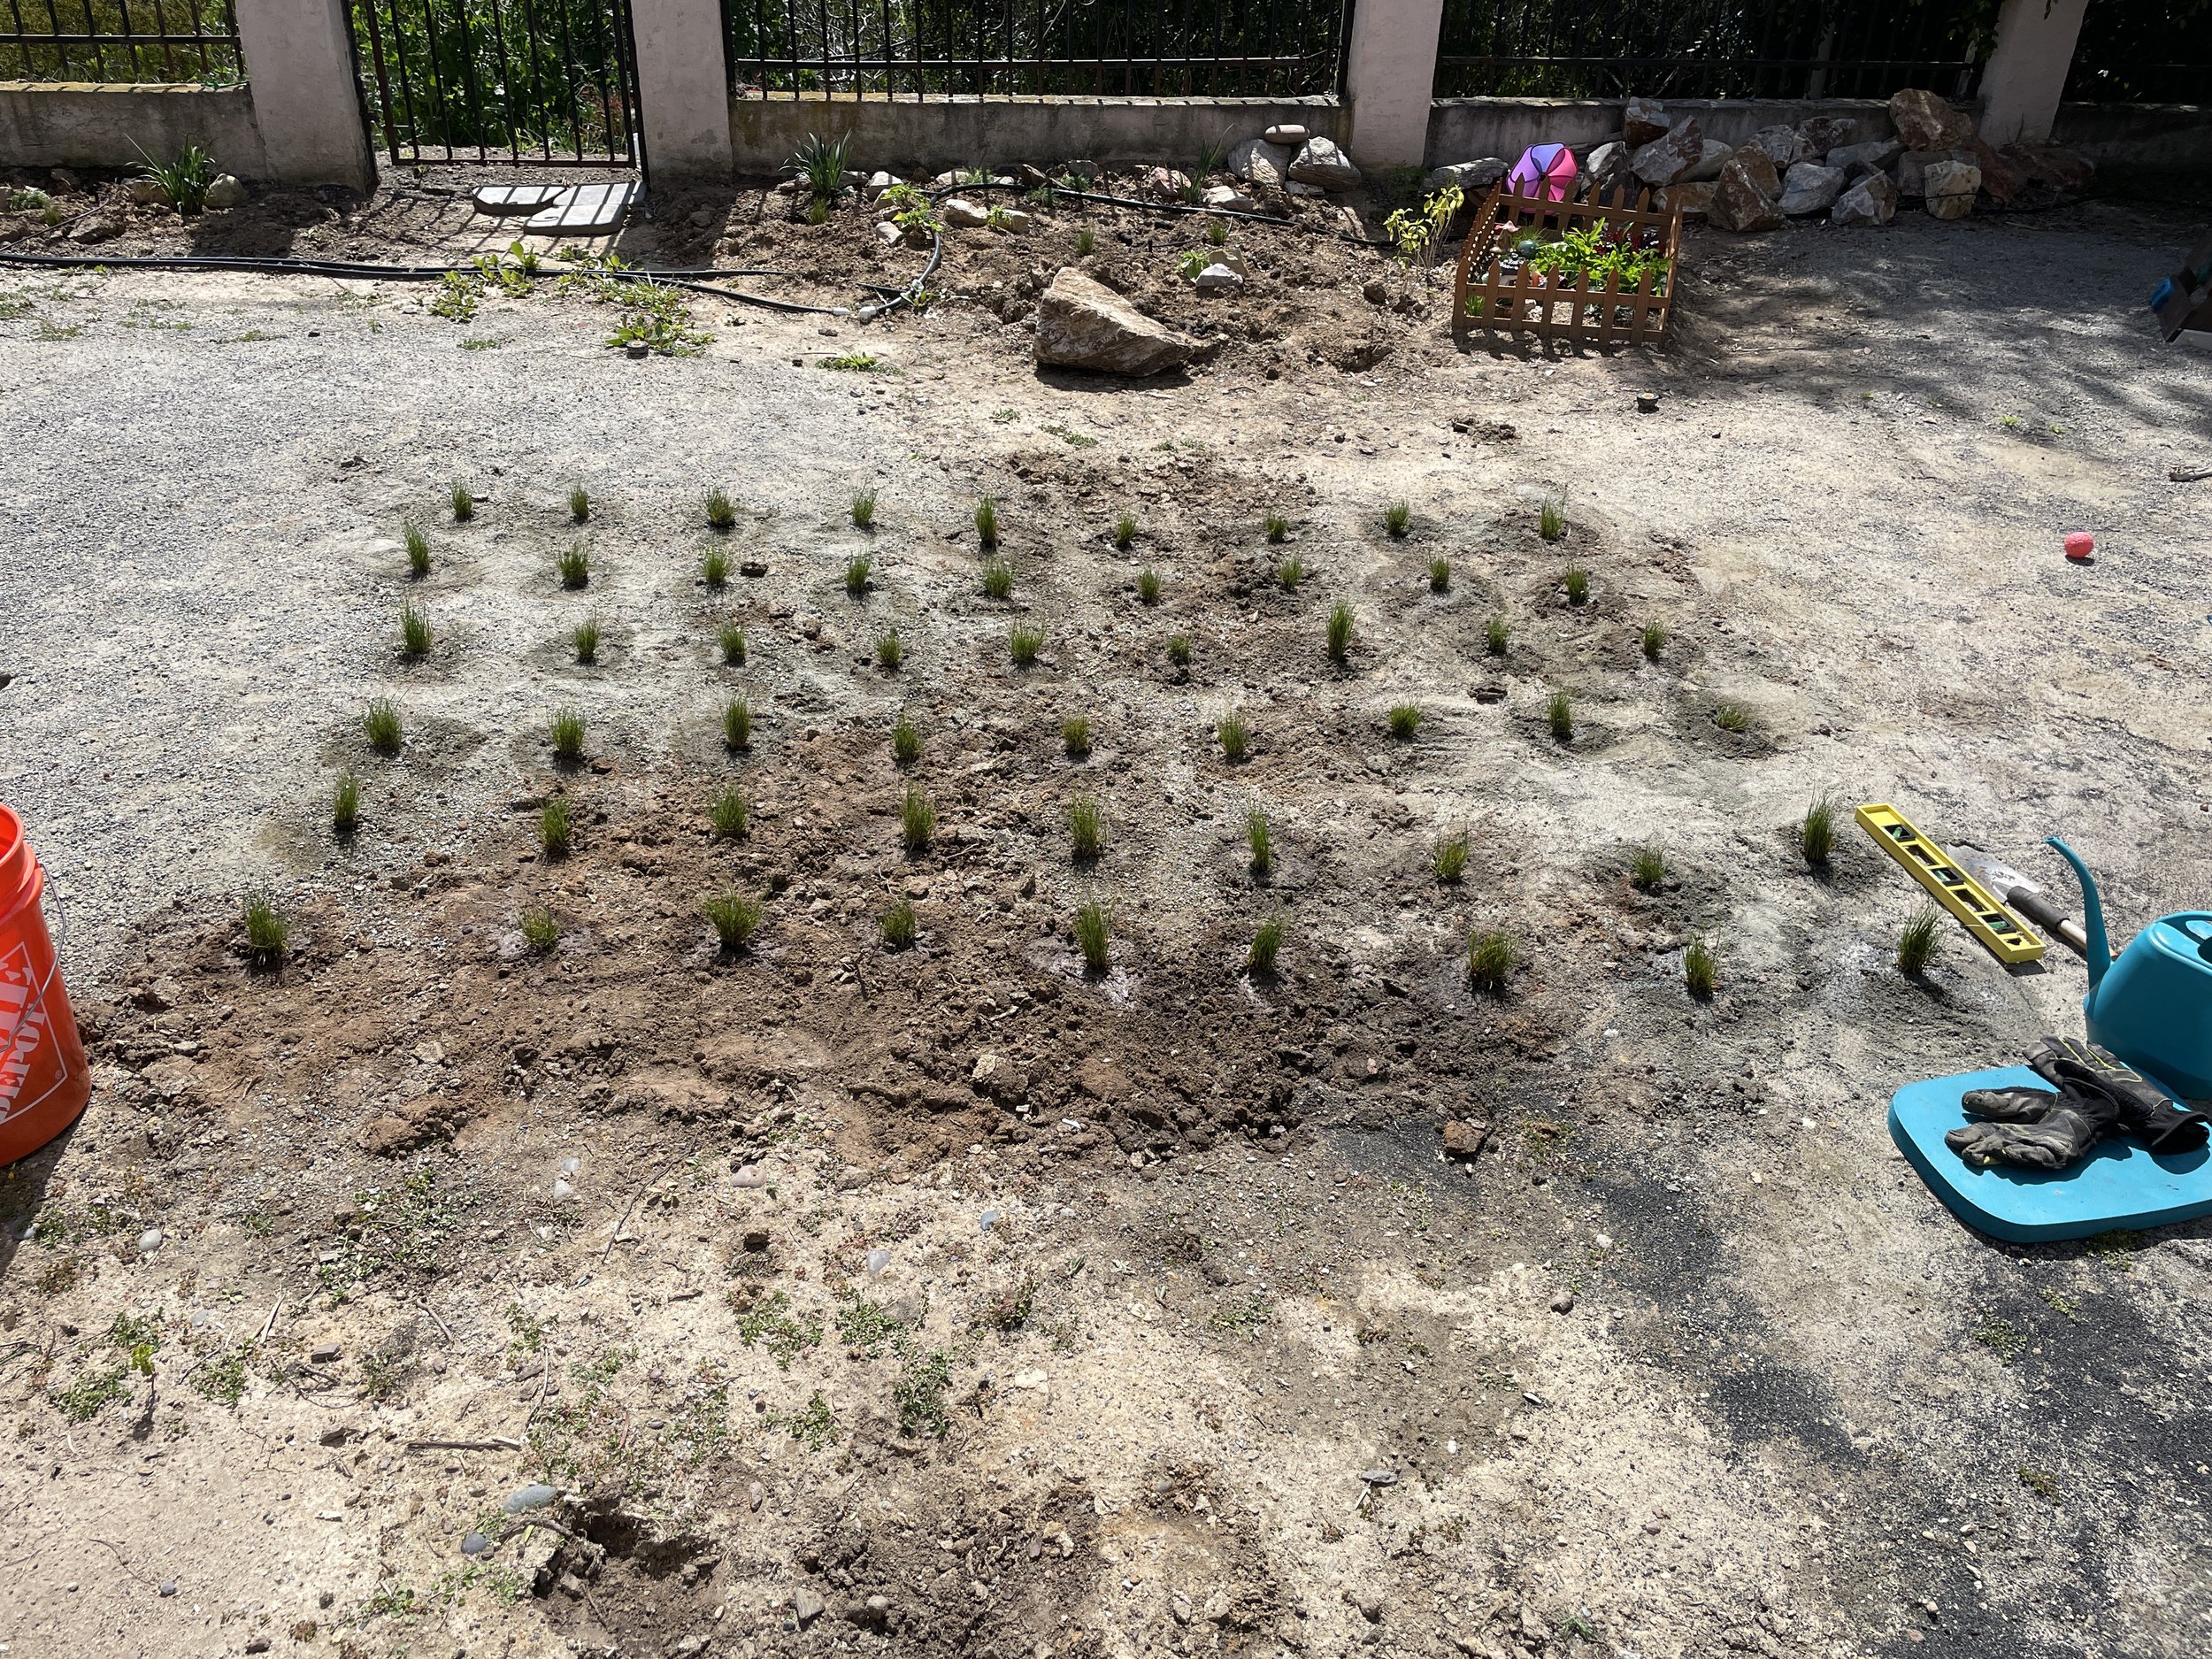
It was so satisfying to drop the first plants in the ground. We had quite a bit of rain in the forecast in January 2023, so I didn’t fuss too much about giving them a ton of water. I just put them in the ground and watered them in.


I know it doesn’t look like much yet, but they grew in quickly!
The previous owners had left some short fencing in the yard, so I used it around the plants to keep my dog from stepping on them when they were babies. I removed the fencing once the plants doubled in size.
I also repurposed larger rocks and small boulders left behind by the previous owners and placed one or two at the base of each plant. Most chaparral plants like to be near a larger rock - it retains moisture and keeps them cool (you just don’t typically see chaparral entirely blanketed in rocks as a mulch).
I kept adding plants here and there as I found them. I bought my plants from a few different places, but Neel’s Nursery in Encinitas is hands down my favorite place to buy California native plants. They often carry plants I’m not able to find elsewhere, and their prices can’t be beat!
Here’s a slideshow of a few other plants I dropped in the ground in January 2023:


4. Add Garden Structures
In prior gardens, I overlooked the importance of structures in the garden. And though trees in the garden eventually provide a sense of structure, there’s something to be said about how garden structures delineate boundaries, create a sense of place, or serve a practical purpose such as seating or a place for kids to play.
Here are some of the main structures I added to the garden:
Arbor and Picket Fence

I wanted a clear delineation between the woodland garden and the native lawn. I wanted something that at least partially obstructed the view but left enough visible that you could see beyond the fence and want to walk through to see what was on the other side. The arbor and picket fence seemed to strike just the right balance of a practical boundary while also having a sense of whimsy.
I planted coast morning glory and desert wild grape on each side of the arbor in the hopes that they would cover the entire area someday and create a secret garden effect.
The Playhouse


(swipe through for some in-progress shots)
Hands down, this was the biggest project of the entire garden. I refer to it as my Everest. A caution to the wise: “some assembly required” amounted to two months of putting this thing together during my daughters’ naps.
But it was 100 percent worth it :)
The Bird Bath
I knew I was going to have some sort of fountain in the yard designed for the birds to bathe and drink in. However, fountains are expensive. So I had planned to put together some sort of DIY fountain.
I won’t lie, I completely lucked out on this one. The previous owners of this house had left behind a fountain that they’d converted to a succulent planter.

A very strong brush, some elbow grease, and a $30 pump later and bibbidy-bobbidy-boo, I had a bird fountain!

I still can’t believe I lucked out on this one. And the birds absolutely love the fountain. The rocks allow birds of all sizes to stand and bathe in the water.
5. Plant a Native Lawn
I always wanted a “lawn” without dealing with the usual problems of a traditional lawn: too much watering, fertilizing, mowing, rescuing from gophers, on and on and on…
I spoke above about how I feel about synthetic turf. I wanted a lawn that was wildlife-friendly, drought-conscious, low-maintenance, dog-tested, and kid-approved.
Enter: the clustered field sedge lawn (carex praegracilis)
I’m sure I’ll post an entire blog someday about why I chose clustered field sedge as my native lawn, how I did it, where I sourced it, etc. For now, enjoy this photo montage depicting the carex installation journey:


So far, it’s held up to all my expectations and more. And yes, it uses far less than 50 percent of water a traditional lawn uses.
Update photos coming at the end of this post :)
6. Spread Mulch
Once my plants were planted and drip emitters connected, I was ready for mulch!
I spent a while researching and opted to use gorilla hair mulch. It retains moisture, is fire-resistant, is slow to decompose (it’s supposed to last 5-10 years!), and native plants are happy to be mulched by the bark of a fellow native plant - the bark of a redwood tree.
And given that my hope is to have the garden eventually produce its own mulch through its leaf litter, I figured five+ years is a good runway to only buy mulch one time. Even though gorilla hair mulch is pricier than other mulches, other mulches tend to decompose after just a year or two.
I found a good deal on gorilla hair mulch through San Diego Mulch. They were professional and speedy. Before I knew it, I had a pile of mulch in my driveway - nine cubic yards of it to be exact!

The process of laying the mulch by myself was pretty tedious. But eventually, I wound up with an entire yard covered in three+ inches of mulch. And I can tell the plants are super happy because of it. Here’s an overhead in-progress shot of the mulch going down:

Eventually I sprinkled mulch in the lawn area to even out the color.
I carried the mulch to the backyard one Home Depot bucket at a time. It was a journey, but it was worth it!
7. Sow Wildflower Seeds
Everything that I read online said not to throw wildflower seeds directly on top of mulch. You want your seeds to have contact with soil for best results.
And it makes sense - if the mulch suppresses weeds then it also probably suppresses wildflower seeds from growing too!
But if I wanted a garden that was completely blanketed in wildflowers, then I’d have to have no mulch to sow seeds everywhere. And I’d also probably wind up with more weeds than wildflowers.
So, I sowed seeds on the mulch. Allllll over the mulch. I bought a few seed packets in spring 2023 and threw them where I wanted the wildflower meadow along the back fence. I literally just tossed them everywhere when there was a bunch of rain in the forecast.

Elegant clarkia with desertbells in the background
It worked. And once those wildflowers went to seed, I collected their seeds and waited until the first rains in fall and I threw them on the ground again, but this time I threw them all over the entire garden, not just in the wildflower meadow.
Did some of the seeds never germinate? I’m positive. Did the birds come through and eat 100 percent of the sunflower seeds I sowed - twice? I’m sure of it. Did I still end up with a gorgeous garden of wildflowers from just a few $4 packets of seed, despite just throwing them on the mulch?
Yes, I did.
So without further ado, here are photos of what the garden looks like now in April 2024 - just a little over a year since I put the first plants in the ground:
California Wildlife Garden After Photos


I did not expect the garden to already be looking this nice after barely a year. Imagine what it will look like once all the woodland trees get their footing. I even have a coast live oak grown from an acorn tucked in there!
I’ll be sure to bring you along for my journey of native plant gardening as things develop. I hope this blog post gave you some practical tools and inspiration for your garden.
Thanks for hanging with me, this was a beast of a blog post to write! But I had a blast putting all of this together.
Until next time: happy gardening!